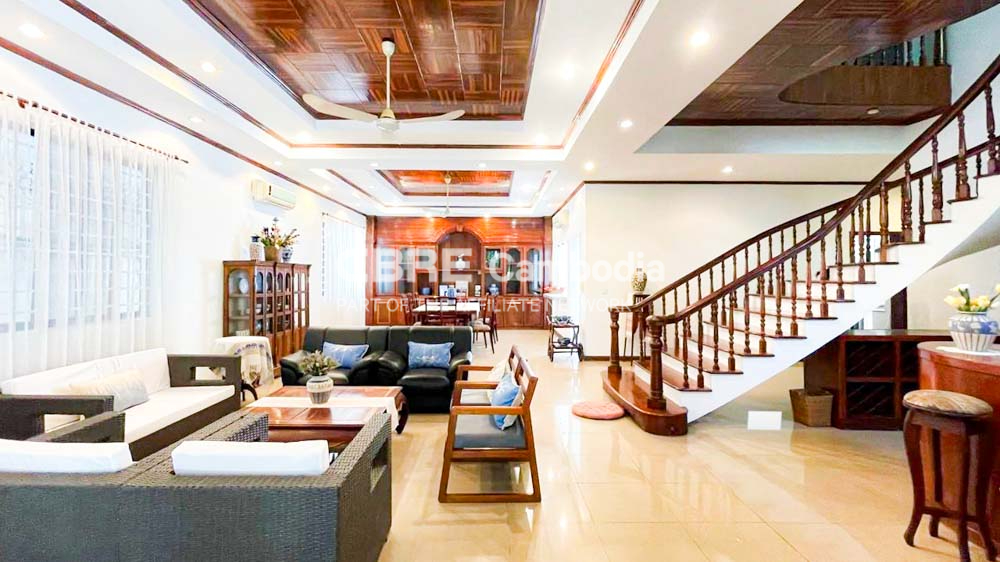
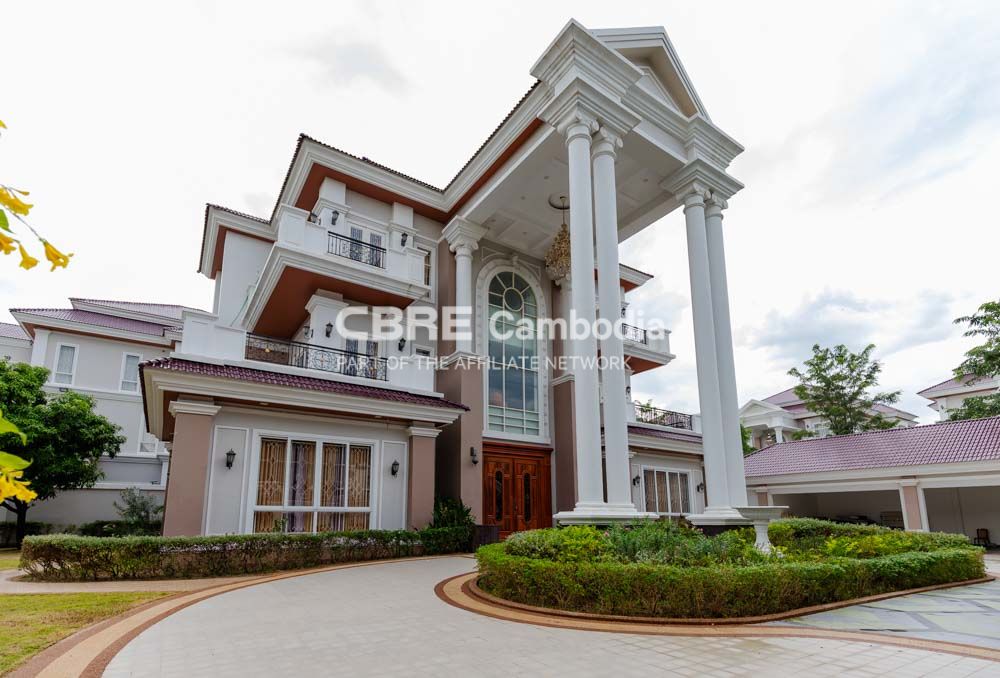
PHP Signature Pad using Jquery Ajax Example

PHP Signature Pad using Jquery Ajax Example

E Signature pad saves image in PHP. In this tutorial, you will learn how to upload signatures using PHP without refreshing the whole web page.

In this example, you will learn how to use the Keith-wood jQuery UI signature pad to create your signature on it. and then create php form & submit that signature image and store that image in folder and db.

E-Signature Pad using jQuery Ajax and PHP

Steps to implement e-signature pad using jQuery Ajax and PHP:

  • Step 1 – Create index.php
  • Step 2 – Create upload.php
  • Step 3 – Create Directory

Step 1 – Create index.php

First of all, create an index.php file and update the below HTML code into your index.php file.

<!DOCTYPE html>
<html>
<head>
    <title>PHP Signature Pad Example - Tutsmake.com</title>
    <link rel="stylesheet" type="text/css" href="https://cdnjs.cloudflare.com/ajax/libs/twitter-bootstrap/4.3.1/css/bootstrap.css">
  
    <script type="text/javascript" src="//ajax.googleapis.com/ajax/libs/jquery/1.12.4/jquery.min.js"></script> 
    <link type="text/css" href="//ajax.googleapis.com/ajax/libs/jqueryui/1.12.1/themes/south-street/jquery-ui.css" rel="stylesheet"> 
    <script type="text/javascript" src="//ajax.googleapis.com/ajax/libs/jqueryui/1.12.1/jquery-ui.min.js"></script>
  
    <script type="text/javascript" src="asset/jquery.signature.min.js"></script>
    <link rel="stylesheet" type="text/css" href="asset/jquery.signature.css">
  
    <style>
        .kbw-signature { width: 400px; height: 200px;}
        #sig canvas{
            width: 100% !important;
            height: auto;
        }
    </style>
  
</head>
<body>
  
<div class="container">
  
    <form method="POST" action="upload.php">
  
        <h1>PHP Signature Pad Example - Tutsmake.com</h1>
  
        <div class="col-md-12">
            <label class="" for="">Signature:</label>
            <br/>
            <div id="sig" ></div>
            <br/>
            <button id="clear">Clear Signature</button>
            <textarea id="signature64" name="signed" style="display: none"></textarea>
        </div>
  
        <br/>
        <button class="btn btn-success">Submit</button>
    </form>
  
</div>
  
<script type="text/javascript">
    var sig = $('#sig').signature({syncField: '#signature64', syncFormat: 'PNG'});
    $('#clear').click(function(e) {
        e.preventDefault();
        sig.signature('clear');
        $("#signature64").val('');
    });
</script>
  
</body>
</html>

This HTML code shows the image upload form, so using this form you can upload the images on the DB table and project folder.

Step 2 – Create upload.php

In this step, create a new file name upload.php file and update the below code into your upload.php file.

<?php
  
    $folderPath = "upload/";
  
    $image_parts = explode(";base64,", $_POST['signed']);
        
    $image_type_aux = explode("image/", $image_parts[0]);
      
    $image_type = $image_type_aux[1];
      
    $image_base64 = base64_decode($image_parts[1]);
      
    $file = $folderPath . uniqid() . '.'.$image_type;
      
    file_put_contents($file, $image_base64);
    echo "Signature Uploaded Successfully.";
?>

This PHP code will upload file into project directory.

Step 3 – Create Directory

In this step, you need to create a directory into your project directory, which named uploads.

Conclusion

Signature pad save image in php. In this tutorial, you have learned how to upload signatures using in PHP without refresh the whole web page.

Recommended PHP Tutorials

AuthorAdmin

My name is Devendra Dode. I am a full-stack developer, entrepreneur, and owner of Tutsmake.com. I like writing tutorials and tips that can help other developers. I share tutorials of PHP, Python, Javascript, JQuery, Laravel, Livewire, Codeigniter, Node JS, Express JS, Vue JS, Angular JS, React Js, MySQL, MongoDB, REST APIs, Windows, Xampp, Linux, Ubuntu, Amazon AWS, Composer, SEO, WordPress, SSL and Bootstrap from a starting stage. As well as demo example.

Leave a Reply

Your email address will not be published. Required fields are marked *