Install React JS in Windows 11/10. In this example tutorial, you will learn how to install react and create first react app in windows 11/10.
This tutorial will show you step by step on how to install create-react-app tool using the Node Package Manager(NPM). Create-react-app is a tool developed by React.js team that makes the setting up of React in our system easier.
First of all, it needs to install Nodejs on our windows 10 system. So, please follow the step is to download the Node.js installer for Windows 10. Let’s use the latest Long Term Support (LTS) version for Windows and choose the 64-bit version, using the Windows Installer icon.
The current stable version of Node.js can be downloaded and installed from the official website of node.js that is given below.
https://nodejs.org
If you want to know how to install node js in windows 10, you can visit How To Install Node Js In Windows 10(with Images).
Download the latest version and install it. You can choose LTS or latest version.
After the node js installation finished, open your terminal and execute the following command to check versions of node js and npm:
node -v
npm -v
How to Install React JS using Create React App in Windows 11/10
There are two ways to install React and create projects. You can follow the following ways:
Option 1 – Install React js on Windows
Step 1 – Create a Directory
First of all, open your terminal and execute the following command to create project directory:
mkdir first-react-app
Step 2 – Move to the project folder
Then, navigate to directory, so open your terminal and execute the following command:
cd first-react-app
Step 3 – Create a package.json file
In this step, The following commandwill walk you through creating a package.json file
npm init
Step 4 – Install React and other modules
In this step, execute the following the following commands to install react in your windows 10 application:
 npm install --save react
 npm install --save react-dom
Option 2 – Install React js on Windows
Step 1 – Install Create-React-App Tool
Now we need to install a tool named create-react-app using NPM as global. This tool is used to create react applications easily from our system.
npm install -g create-react-app
Step 2 – Creating a New React Project
After the successful installation of create-react-app, we can create our first react application using it.
create-react-app first-react-project
Here first-react-project is the name I have chosen for my react project.
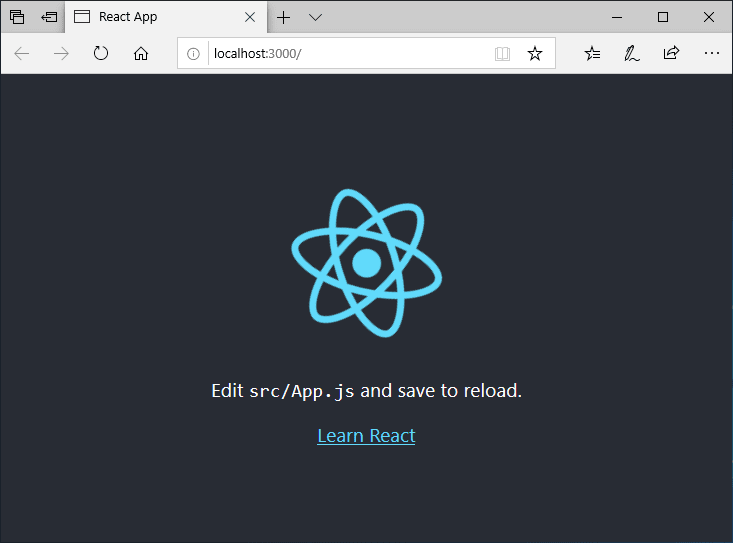
Step 3 – Running the Application
The app we created can run locally on our system with npm start command.
cd first-react-project
npm start
This will opens up the react application in a new tab of our browser with the below URL.
http://localhost:3000
Thanks good helping content .