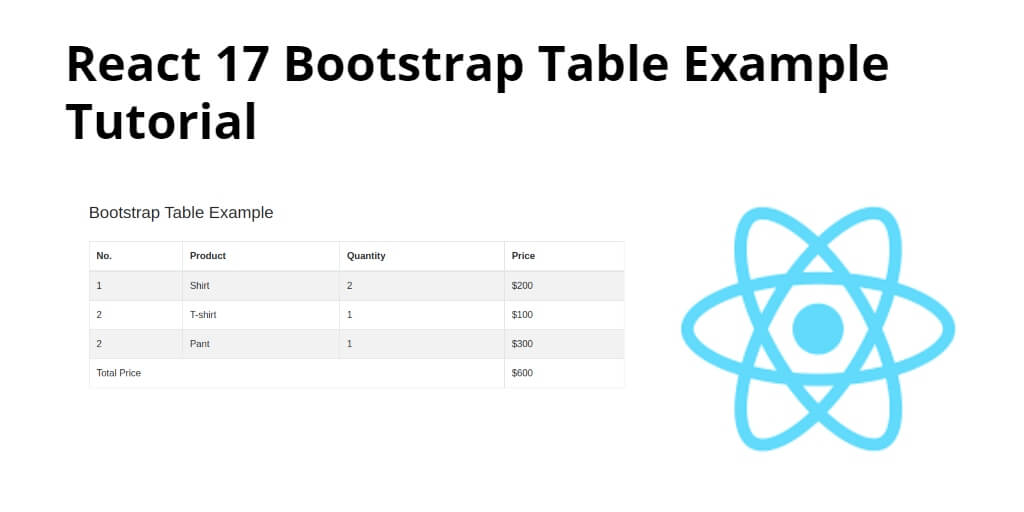
React Bootstrap is a popular front-end framework for building responsive and dynamic web applications. One of the most useful features of React Bootstrap is its table component, which allows developers to quickly and easily create tables that are both functional and aesthetically pleasing.
In this tutorial, you will learn how to use the React Bootstrap table component to build a basic table with some interactive features.
React-Bootstrap is a front-end framework that was designed keeping react in mind. Bootstrap was re-built and revamped for React, hence it is known as React-Bootstrap.
React js Bootstrap Table Example Tutorial
Follow the following steps to implement bootstrap table in react js:
- Step 1 – Create React App
- Step 2 – Install Bootstrap 4
- Step 3 – Create Bootstrap Table Component
- Step 4 – Add Bootstrap Table Component in App.js
Step 1 – Create React App
In this step, open your terminal and execute the following command on your terminal to create a new react app:
npx create-react-app my-react-app
To run the React app, execute the following command on your terminal:
npm start
Check out your React app on this URL: localhost:3000
Step 2 – Install React Bootstrap
To follow along with this tutorial, you should have a basic understanding of React and Bootstrap. If you’re new to these technologies, it may be helpful to review some introductory tutorials before diving in.
Execute the following command on terminal to install React Bootstrap and its dependencies. Open your terminal and navigate to your project directory, then run the following command:
npm install bootstrap --save

npm install react-bootstrap bootstrap
Add bootstrap.min.css file in src/App.js file:
import React, { Component } from 'react'

import '../node_modules/bootstrap/dist/css/bootstrap.min.css';

function App() {
  return (
    <div>
      <h2>How to Add Bootstrap table in React</h2>
    </div>
  );
}

export default App;
Step 3 – Create Bootstrap Table Component
Import “import { Table } from ‘react-bootstrap'” Into your table component.
Create BootstrapTable.js file. So, visit the src directory of your react js app and create a table component file named BootstrapTable.js. And add the following code into it:
import React from 'react'
import { Table } from 'react-bootstrap'

class BootstrapTable extends React.Component{

    render(){
        return(
            <div>
                <div className="row">
                    <div className="col-md-8 offset-md-2">
                        <br /><br />
                        <h3>Bootstrap Table Example</h3><br />

                        <Table striped bordered hover responsive="md">
                            <thead>
                                <tr>
                                    <th>No.</th>
                                    <th>Product</th>
                                    <th>Quantity</th>
                                    <th>Price</th>
                                </tr>
                            </thead>
                            <tbody>
                                <tr>
                                    <td>1</td>
                                    <td>Shirt</td>
                                    <td>2</td>
                                    <td>$200</td>
                                </tr>
                                <tr>
                                    <td>2</td>
                                    <td>T-shirt</td>
                                    <td>1</td>
                                    <td>$100</td>
                                </tr>
                                <tr>
                                    <td>2</td>
                                    <td>Pant</td>
                                    <td>1</td>
                                    <td>$300</td>
                                </tr>
                                <tr>
                                    <td colSpan="3">Total Price</td>
                                    <td>$600</td>
                                </tr>
                            </tbody>
                        </Table>
                    </div>
                </div>
            </div>
        )
    }
}

export default BootstrapTable;
Step 4 – Add Bootstrap Table Component in App.js
In this step, you need to add BootstrapTable.js file in src/App.js file:
import React from 'react';

import '../node_modules/bootstrap/dist/css/bootstrap.min.css';

import BootstrapTable from './BootstrapTable'

function App() {

  return (
    <div className="App">
      <BootstrapTable />
    </div>
  );
}

export default App;
Conclusion
React bootstrap table example; In this tutorial, you have learned how to implement bootstrap table in react js apps.
Tables in react-bootstrap come with predefined style classes which are both responsive and reliable.
Table props:
- bordered: Adds borders on all sides of the tables and cells.
- borderless: Removes borders on all sides including table header.
- variant: It is used to invert the colors of the table from dark to light and vice versa.
- size: It is used to set the size of the table. When we set it as ‘sm’ the cell padding is reduced by half.
- bsPrefix: It is an escape hatch for working with strongly customized bootstrap CSS.
Now in this Bootstrap table in React tutorial will provide you step by step guide on how to add bootstrap table in react js app with the bootstrap 4 library.
