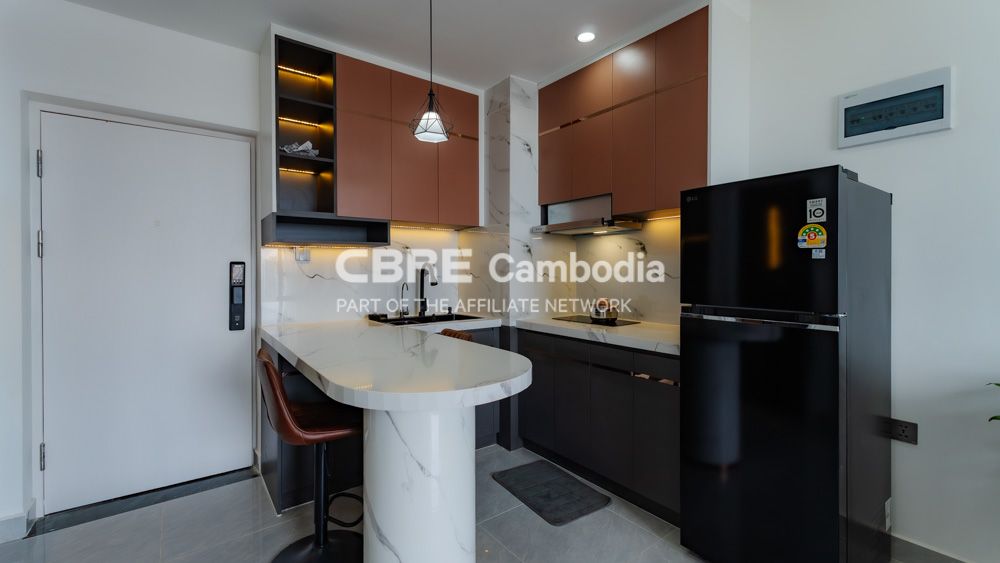
How to Upload Files on Amazon s3 Cloud using Laravel Filesystem. This tutorial would love to share with you how you can easily upload files or images on amazon s3 bucket cloud storage.
And as well as, show you how to create an account, create buckets and policies on amazon s3 cloud storage. And where you can find credentials.
how to upload an image file to s3 bucket in laravel; In this tutorial, you will learn how to upload images or files to amazon s3 cloud storage.
How to Upload File to Aws S3 using Laravel Filesystem
Follow the below-given steps, you can upload files or images on amazon s3 cloud storage using laravel filesystem:
- Step 1 – Install Laravel App
- Step 2 – Setup amazon s3 bucket
- Step 3 – Setup amazon s3 Cloud Storage Credentials
- Step 4 – Install s3 package
- Step 5 – Create File Upload Route
- Step 6 – Create File Upload Controller
- Step 7 – Create a View File
- Step 8 – Start Development Server
Step 1 – Install Laravel App
First of all, You need to install the laravel fresh application. Use the below command and download fresh new laravel setup :
composer create-project --prefer-dist laravel/laravel laravelS3
Step 2 – Setup amazon s3 bucket
Setup amazon aws s3 bucket account; so you need to create account on amazon s3 to store our images/files. First, you need to sign up for Amazon.
You should follow this link to signup. After successfully signing you can create your bucket. You can see the below image for better understanding.
Now You need to create a bucket policy, so you need to go to this link. And the page looks like this.
You can see the page looks like this.
You have created a bucket policy, Then copy-paste into a bucket policy. You can see the below image.
Now you will go here to get our Access Key Id and Secret Access Key. and put the credentials into the laravel project .env file.
Step 3 – Setup amazon s3 Cloud Storage Credentials
Setup amazon s3 cloud storage credentials; so you need to put the API Key and Secret Key in .env file. You can add the following field in your .env file
AWS_ACCESS_KEY_ID=xxxxx AWS_SECRET_ACCESS_KEY=xxxx AWS_DEFAULT_REGION=ap-south-1 AWS_BUCKET=laravelimage
Step 4 – Install s3 package
Install aws s3 package; so you need to install s3 package via the Composer package manager in laravel project.
composer require league/flysystem-aws-s3-v3
Step 5 – Create File Upload Route
Create file upload routes; Go to app/routes/web.php file and create two below routes here :
<?php use Illuminate\Support\Facades\Route; use App\Http\Controllers\ImageController; Route::get('image', [ ImageController::class, 'index' ]); Route::post('store', [ ImageController::class, 'store' ]);
Step 6 – Create File Upload Controller
Create a controller name ImageController. Use the below command and create Controller :
php artisan make:controller ImageController
After successfully create the controller; go to app/http/controllers/ImageController.php and add the below code into it:
<?php namespace App\Http\Controllers; use Illuminate\Http\Request; use Storage; class ImageController extends Controller { public function index() { return view('image'); } public function store(Request $request) { $this->validate($request, ['image' => 'required|image']); if($request->hasfile('image')) { $file = $request->file('image'); $name=time().$file->getClientOriginalName(); $filePath = 'images/' . $name; Storage::disk('s3')->put($filePath, file_get_contents($file)); return back()->with('success','Image Uploaded successfully'); } } }
Step 7 – Create Blade view
Create blade view file. Go to app/resources/views and create one file name image.blade.php :
<!DOCTYPE html> <html> <head> <meta charset="utf-8"> <title>Upload Image to Amazon s3 cloud Storage Using laravel</title> <link rel="stylesheet" href="{{asset('css/app.css')}}"> <link rel="stylesheet" href="https://maxcdn.bootstrapcdn.com/bootstrap/4.0.0/css/bootstrap.min.css"> <script src="https://code.jquery.com/jquery-3.2.1.slim.min.js"></script> <script src="https://cdnjs.cloudflare.com/ajax/libs/popper.js/1.12.9/umd/popper.min.js"></script> <script src="https://maxcdn.bootstrapcdn.com/bootstrap/4.0.0/js/bootstrap.min.js"></script> </head> <body> <div class="container"> <h2>Laravel Upload Image to Amazon s3 cloud Storage Tutorial</h2><br/> @if (\Session::has('success')) <div class="alert alert-success"> <p>{{ \Session::get('success') }}</p> </div><br /> @endif @if (count($errors) > 0) <div class="alert alert-danger"> <strong>Whoops!</strong> There were some problems with your input.<br><br> <ul> @foreach ($errors->all() as $error) <li>{{ $error }}</li> @endforeach </ul> </div> @endif <form method="post" action="{{url('store')}}" enctype="multipart/form-data"> @csrf <div class="row"> <div class="col-md-4"></div> <div class="form-group col-md-4"> <input type="file" name="image"> </div> </div> <div class="row"> <div class="col-md-4"></div> <div class="form-group col-md-4"> <button type="submit" class="btn btn-success">Upload</button> </div> </div> </form> </div> </body> </html>
Step 8 – Start Development Server
Start the development server. Use the PHP artisan serve command and start your server :
php artisan serve
If you want to run the project diffrent port so use this below command
php artisan serve --port=8080
Now you are ready to run our example so run bellow command to quick run.
http://localhost:8000/image Or direct hit in your browser http://localhost/laravelS3/public/image
Conclusion
In this tutorial, You have successfully uploaded images or files on amazon s3 cloud storage using laravel filesystem.
Recommended Laravel tutorials
If you have any questions or thoughts to share, use the comment form below to reach us.
Thanks a lot this work for me!! maybe you can show how to delete this image !!^^