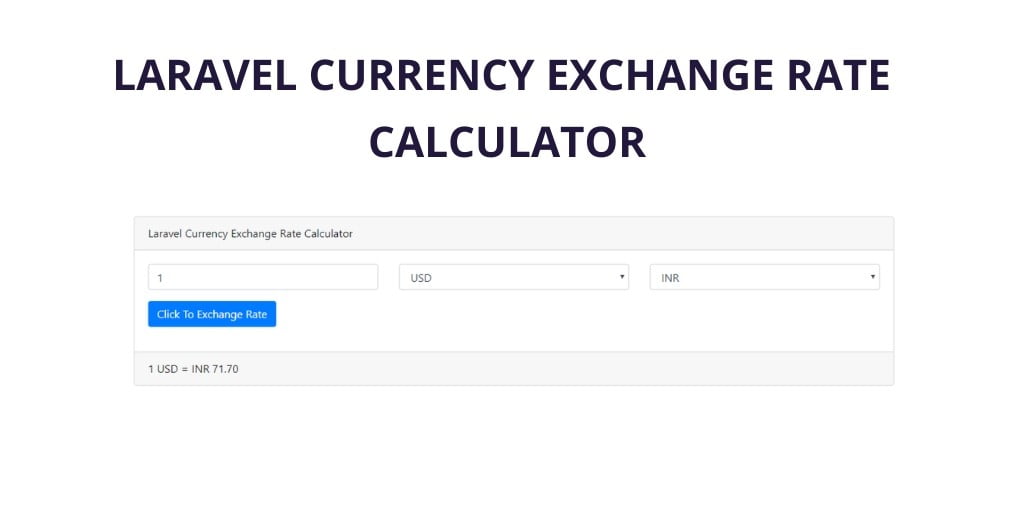
Laravel creates a currency exchange rate calculator or converter example tutorial. In this tutorial, we will learn how to create currency exchange rates calculator in laravel applications without using any package with examples.
This example tutorial also work with laravel 7.x version.
This Laravel tutorial has the purpose to explain how to easily create a currency converter application in laravel without using any package. And also you can download laravel currency converter application here https://github.com/tutsmake/laravel-currency-converter-application
You can check out the live currency exchange or converter tool here => click me
Laravel Currency Exchange Rate Example Tutorial
Just follow the below steps and create a currency exchange rate calculator in laravel application:
- Install Laravel Fresh New Setup
- Signup and Get API KEY
- Create Route & Controller
- Create the blade view
- Start Development Server
Step 1:- Install Laravel Fresh New Setup
We need to install laravel 6 fresh application using below command, Open your command prompt and run the below command :
composer create-project --prefer-dist laravel/laravel lara-currency
After successfully install laravel 6 Application, Go to your root directory using the command line. and follow the below steps.
Step 2 :- SignUp and Get API KEY
Next, Go to this link https://free.currencyconverterapi.com/ and get API Key. Because when we will call the API, need put to API key into this.
Step 3 :- Create Route & Controller
Create the CurrencyController using the below command:
php artisan make:controller CurrencyController
This command will create a controller name CurrencyController.
Next, We need to add the route. Go to routes/web.php put the below routes here :
 Route::get('currency','CurrencyController@index');
 Route::post('currency','CurrencyController@exchangeCurrency');
Next open controller, Go to app/HTTP/Controller/CurrencyController and put the below code here :
<?php

namespace App\Http\Controllers;

use Illuminate\Http\Request;

use AshAllenDesign\LaravelExchangeRates\ExchangeRate;

use Guzzle\Http\Exception\ClientErrorResponseException;

use carbon\Carbon;

class CurrencyController extends Controller
{
    //

    public function index() {

     return view('currency');
    }

    public function exchangeCurrency(Request $request) {

      $amount = ($request->amount)?($request->amount):(1);

	  $apikey = 'd1ded944220ca6b0c442';

	  $from_Currency = urlencode($request->from_currency);
	  $to_Currency = urlencode($request->to_currency);
	  $query =  "{$from_Currency}_{$to_Currency}";

	  // change to the free URL if you're using the free version
	  $json = file_get_contents("http://free.currencyconverterapi.com/api/v5/convert?q={$query}&compact=y&apiKey={$apikey}");

	  $obj = json_decode($json, true);

	  $val = $obj["$query"];

	  $total = $val['val'] * 1;

	  $formatValue = number_format($total, 2, '.', '');

      $data = "$amount $from_Currency = $to_Currency $formatValue";

      echo $data; die;


   }

}
Step 4:- Create the blade view
In this step, we need to create blade view files, Go to app/resources/views/ and create one blade view name currency.blade.php.
After successfully create the blade view file, update the below-given code into your currency.blade.php file:
currency.blade.php
<!DOCTYPE html>
<html>
<head>
<title>Laravel Currency Exchange Rate Calculator - Tutsmake.com</title>
<meta name="csrf-token" content="{{ csrf_token() }}">
<link rel="stylesheet" href="https://stackpath.bootstrapcdn.com/bootstrap/4.4.1/css/bootstrap.min.css">
<script src="https://code.jquery.com/jquery-3.4.1.js"></script>
</head>
<body>

<div class="container mt-5">
  <div class="card">
	  <div class="card-header">
	    Laravel Currency Exchange Rate Calculator
	  </div>
	  <div class="card-body">
		<form id="currency-exchange-rate" action="#" method="post" class="form-group">
		   <div class="row mb-3">

                <div class="col-md-4">
                 <input type="text" name="amount" class="form-control" value="1">
		        </div>

		        <div class="col-md-4">
				<select name="from_currency" class="form-control">

				 <option value='AUD'>AUD</option>
				 <option value='BGN'>BGN</option>
				 <option value='BRL'>BRL</option>
				 <option value='CAD'>CAD</option>
				 <option value='CHF'>CHF</option>
				 <option value='CNY'>CNY</option>
				 <option value='CZK'>CZK</option>
				 <option value='DKK'>DKK</option>
				 <option value='EUR'>EUR</option>
				 <option value='GBP'>GBP</option>
				 <option value='HKD'>HKD</option>
				 <option value='HRK'>HRK</option>
				 <option value='HUF'>HUF</option>
				 <option value='IDR'>IDR</option>
				 <option value='ILS'>ILS</option>
				 <option value='INR'>INR</option>
				 <option value='ISK'>ISK</option>
				 <option value='JPY'>JPY</option>
				 <option value='KRW'>KRW</option>
				 <option value='MXN'>MXN</option>
				 <option value='MYR'>MYR</option>
				 <option value='NOK'>NOK</option>
				 <option value='NZD'>NZD</option>
				 <option value='PHP'>PHP</option>
				 <option value='PLN'>PLN</option>
				 <option value='RON'>RON</option>
				 <option value='RUB'>RUB</option>
				 <option value='SEK'>SEK</option>
				 <option value='SGD'>SGD</option>
				 <option value='THB'>THB</option>
				 <option value='TRY'>TRY</option>
				 <option value='USD'>USD</option>
				 <option value='ZAR'>ZAR</option>
			    </select>
			    </div>

			    <div class="col-md-4">
				<select name="to_currency" class="form-control">

				 <option value='AUD'>AUD</option>
				 <option value='BGN'>BGN</option>
				 <option value='BRL'>BRL</option>
				 <option value='CAD'>CAD</option>
				 <option value='CHF'>CHF</option>
				 <option value='CNY'>CNY</option>
				 <option value='CZK'>CZK</option>
				 <option value='DKK'>DKK</option>
				 <option value='EUR'>EUR</option>
				 <option value='GBP'>GBP</option>
				 <option value='HKD'>HKD</option>
				 <option value='HRK'>HRK</option>
				 <option value='HUF'>HUF</option>
				 <option value='IDR'>IDR</option>
				 <option value='ILS'>ILS</option>
				 <option value='INR'>INR</option>
				 <option value='ISK'>ISK</option>
				 <option value='JPY'>JPY</option>
				 <option value='KRW'>KRW</option>
				 <option value='MXN'>MXN</option>
				 <option value='MYR'>MYR</option>
				 <option value='NOK'>NOK</option>
				 <option value='NZD'>NZD</option>
				 <option value='PHP'>PHP</option>
				 <option value='PLN'>PLN</option>
				 <option value='RON'>RON</option>
				 <option value='RUB'>RUB</option>
				 <option value='SEK'>SEK</option>
				 <option value='SGD'>SGD</option>
				 <option value='THB'>THB</option>
				 <option value='TRY'>TRY</option>
				 <option value='USD'>USD</option>
				 <option value='ZAR'>ZAR</option>
			    </select>
			    </div>


		   </div>

	       <div class="row">
	      	<div class="col-md-4">
	      	<input type="submit" name="submit" id="btnSubmit" class="btn btn-primary " value="Click To Exchange Rate">
	      	</div>
	      </div>

		</form>
	  </div>
	   <div class="card-footer">
        <span id="output"></span>
	   </div>
  </div>
</div>
<script>
	$(document).ready(function () {

	  $.ajaxSetup({
          headers: {
              'X-CSRF-TOKEN': $('meta[name="csrf-token"]').attr('content')
          }
      });

    $("#btnSubmit").click(function (event) {

        //stop submit the form, we will post it manually.
        event.preventDefault();

        // Get form
        var form = $('#currency-exchange-rate')[0];

       // Create an FormData object
        var data = new FormData(form);

       // disabled the submit button
        $("#btnSubmit").prop("disabled", true);

        $.ajax({
            type: "POST",
            url: "{{ url('currency') }}",
            data: data,
            processData: false,
            contentType: false,
            cache: false,
            timeout: 800000,
            success: function (data) {

                $("#output").html(data);

                $("#btnSubmit").prop("disabled", false);

            },
            error: function (e) {

                $("#output").html(e.responseText);
                console.log("ERROR : ", e);
                $("#btnSubmit").prop("disabled", false);

            }
        });

    });

});
</script>
</body>
</html>
Step 5 :- Run Development Server
In this step, we will use the PHP artisan serve command. It will start your server locally
php artisan serve

If you want to run the project diffrent port so use this below command

php artisan serve --port=8080
Now we are ready to run our example so run bellow command to quick run.
http://localhost:8000/currency
Conclusion
In this article, We have learned how to create a currency converter in laravel using the laravel currency converter without package with example. Our examples run quickly.
Recommended Laravel Tutorial
- Laravel Tutorial From Scratch | Step By Step
- Laravel 6 Ajax CRUD(DataTables Js) Tutorial Example
- Laravel 6 – Ajax CRUD (Operation) Application Example
- Laravel 6 Angular JS CRUD Example Tutorial
- Upload Files/Images to Amazon s3 Cloud Using Laravel 6 Filesystem
- Laravel 6 CKEditor with Image Upload
- Ajax Image Upload In Laravel Tutorial Example From Scratch
- Laravel 6 Intervention Upload Image Using Ajax – Example
- Laravel Upload Image to Database with Validation
- Send Email Example Laravel
- Generate OR Create PDF In Laravel 6 Example
- Simple Generator or Create Qr Code Example Laravel
- Laravel Custom Cron Schedule Example Tutorial
- Laravel 6 Github Login Example
